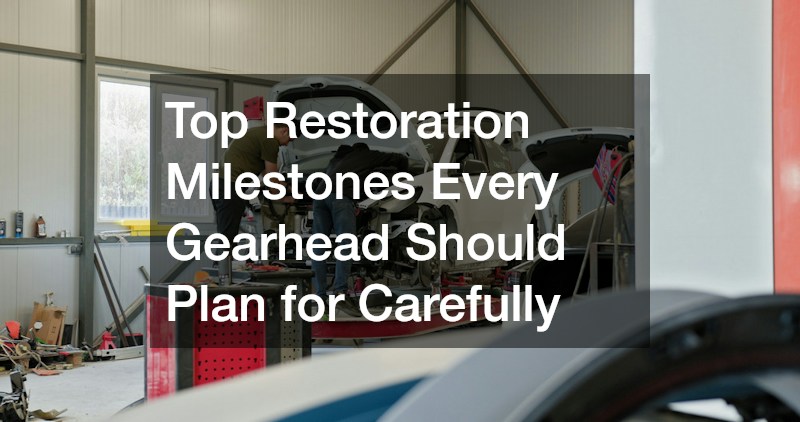
Every automotive enthusiast harbors the dream of taking a forgotten classic, a neglected barn find, or an aging performance machine and restoring it to its former glory. There is an undeniable thrill in breathing new life into tired metal, reviving historical engineering, and ultimately turning heads at car meets or on the open highway. However, the path from a rusted, non-running shell to a polished, roadworthy showpiece is rarely a straight line.
Without a clear roadmap, project car restorations frequently stall. Budgets explode, scope creep sets in, and unorganized builds end up listed online as half-finished projects. The key to completing a build successfully lies in logical sequencing. By breaking down your restoration into distinct, manageable milestones—and tackling them in the correct structural order—you can protect your financial investment, maintain momentum, and build a machine that is as safe and reliable as it is stunning.
Phase 1: Structural Foundation and Chassis Stabilization

Before dreaming about high-horsepower engine builds or mirror-finish custom paint, you must establish a solid, safe baseline. Building a high-performance engine or applying pristine paint on a twisted, rusted, or structurally compromised chassis is a recipe for disaster. Phase one centers on ensuring the vehicle’s frame, suspension, and steering geometry are structurally sound.
Audit and Restore Suspension Geometry to Factory Specifications
Decades of road stress, dry rot, and rust degrade suspension components. Worn bushings allow the suspension to shift unpredictably under load, leading to sloppy handling, uneven tire wear, and compromised safety.
When overhauling your vehicle’s chassis, prioritize these critical structural steps:
-
Strip and Inspect the Subframe: Media-blast suspension arms, crossmembers, and subframes to bare metal to check for hidden stress cracks, severe rust scale, or previous accident damage.
-
Upgrade Bushings and Hardware: Replace soft, rotted rubber factory bushings with high-density polyurethane or spherical bearings depending on whether your build targets comfortable street cruising or aggressive track use.
-
Replace Damping Components: Never re-use aging, fluid-leaking struts or worn dampening units. Completing auto shock replacements across all four corners restores controlled spring oscillation, eliminates excessive body roll, and ensures your tires maintain optimal contact with the road.
Eliminate Frame Twists and Dial in Precision Steering Calibration
Once fresh suspension hardware is installed, you must verify that the vehicle chassis is square. Even a subtle twist in a unibody structure or ladder frame can cause tracking issues that no basic alignment can correct.
-
Measure Frame Datum Points: Use factory service manual chassis dimensions and a tram gauge to verify diagonal reference measurements across the undercarriage.
-
Set Baseline Ride Heights: Adjust coilovers or torsion bars to target ride heights before tightening control arm pivot bolts under full vehicle weight to prevent premature bushing binding.
-
Perform Precision Geometry Adjustments: Roll the vehicle onto specialized equipment at dedicated car alignment shops. Standard quick-lube alignment racks often lack the custom specs or patience needed for vintage or heavily modified suspension setups. A specialist will dial in custom camber, caster, and toe settings tailored to your specific tire width and driving goals.
Phase 2: Powertrain Sourcing and Heavy Mechanical Overhauls
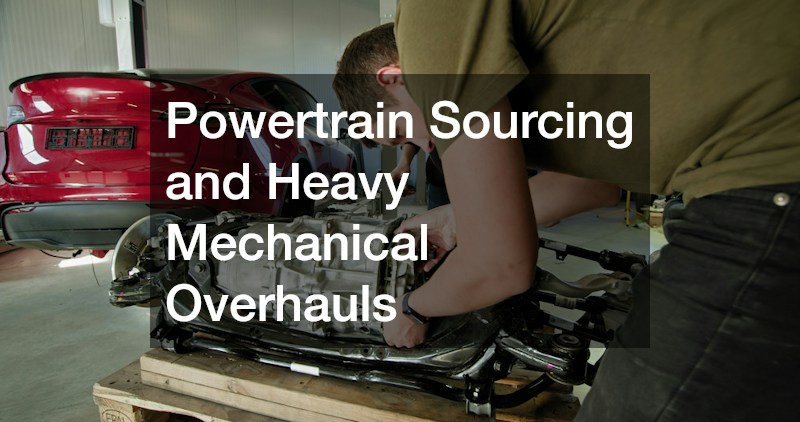
With a straight, structurally sound chassis waiting on the lift, the next milestone focuses on the heart of your machine: the powertrain. Whether you are rebuilding the original numbers-matching engine or executing a modern crate engine swap, mechanical reliability requires meticulous attention to detail.
Navigate Complex Euro-Spec Performance Engineering and Electronics
Restoring European performance cars—especially modern classics from the 1980s through the 2000s—presents unique engineering challenges. Intricate vacuum networks, early electronic fuel injection systems, and tight engine bay packaging demand specialized technical knowledge.
-
Address Known Model Weaknesses: Every engine family has fatal flaws. For example, when tackling complex audi repairs, replacing fragile plastic timing chain guides, servicing double-VANOS/VVT units, and refreshing high-pressure fuel pumps are essential preventative steps while the engine is out of the bay.
-
Replace Deteriorated Wiring Harnesses: Engine bay heat cycles make vintage wiring brittle. Install fresh, reproduction wiring looms to prevent intermittent electrical shorts, sensor failures, and mysterious misfires later on.
-
Bench-Test Before Installation: Always prime the oiling system and perform leak-down and compression tests on the engine engine stand before bolting it to the transmission and dropping it into the chassis.
Overhaul High-Torque Heavy-Duty and Diesel Powertrains
If your project involves a classic utility truck, a vintage agricultural vehicle, or a heavy-duty tow rig restoration, mechanical considerations shift toward high torque, extreme compression ratios, and robust fuel delivery.
Restoring heavy oil-burners requires specialized industrial tools:
-
Precision Machining: Diesel engine blocks require precise cylinder honing and deck surfacing to withstand extreme cylinder pressures. Partnering with a dedicated diesel mechanic shop ensures that line-boring, crankshaft grinding, and head surfacing meet strict manufacturer tolerances.
-
Fuel Injection System Rebuilds: High-pressure mechanical fuel pumps and injectors must be flow-tested and calibrated on specialized test benches to ensure balanced fuel delivery across all cylinders.
-
Turbocharger Servicing: Inspect turbine blades for shaft play or dusting. Rebuilding or upgrading the turbocharger guarantees proper boost pressure without pushing oil into the intake tract.
Phase 3: Exhaust Routing, Backpressure, and Emissions Compliance
An engine is essentially a massive air pump. Sourcing intake air and burning fuel efficiently is only half the equation; getting spent exhaust gases out of the combustion chamber cleanly and quietly is just as vital for performance and driving comfort.
Custom-Fit Pipes and Silencers to Eliminate Cabin Drone
Exhaust design is a fine balance between engine performance, sound profile, and spatial clearance. Running pipes too large kills low-end exhaust gas velocity, while pipes that are too small create excessive backpressure and restrict peak horsepower.
-
Opt for Mandrel Bends: Ensure all custom exhaust piping uses mandrel bends rather than crush bends. Mandrel bending maintains a uniform pipe diameter through turns, maximizing exhaust flow.
-
Control Interior Resonance: High-frequency exhaust drone inside the cabin ruins the driving experience. Tackling targeted muffler repairs by replacing rotted baffles or installing tuned resonator chambers eliminates unwanted cabin boom at highway cruising speeds.
-
Isolate Thermal Radiation: Route pipes at least two inches away from floorboards, fuel lines, and brake hoses. Use ceramic coatings or stainless heat shields to protect sensitive cabin footwells from extreme exhaust temperatures.
Integrate Modern Flow-Efficient Emissions Systems
Even on vintage builds, managing exhaust emissions and smelling like raw gasoline after a short drive is no longer acceptable in the modern car scene. Integrating modern, high-flow emissions hardware keeps your vehicle clean-running, pleasant to drive behind, and legally compliant.
When plumbing your exhaust network:
-
Position Oxygen Sensors Correctly: Place wideband O2 sensors downstream from collector merges at a slight downward angle to prevent condensation from settling on the sensor element.
-
Install High-Flow Catalytic Hardware: Sourcing modern, metallic-core local catalytic converters allows your engine to breathe freely while scrubbing toxic carbon monoxide and unburnt hydrocarbons from the exhaust stream. Modern high-flow units cause virtually zero horsepower restriction compared to vintage 1970s pellet-style converters.
-
Secure Leak-Free Clamps: Use heavy-duty V-band flanges or lap-joint band clamps instead of cheap U-bolt clamps. V-band clamps provide a gas-tight seal while allowing quick disassembly when transmission or driveshaft service is required.
Phase 4: Body Prep, Custom Refinishing, and Glass Installation

Once the mechanical systems are plumbed and tested, the restoration shifts to aesthetic transformation. This phase demands the highest concentration of labor hours and patience. Shortcuts taken during metal prep or bodywork will show through the final paint layer under direct sunlight.
Execute Multi-Stage Body Preparation, Rust Remediation, and Finish Application
The secret to a jaw-dropping exterior is 90% preparation and 10% paint spraying. You cannot hide poor bodywork behind shiny clear coat.
Follow these professional bodywork milestones:
-
Strip Down to Bare Metal: Chemical stripping, media blasting, or hand-sanding removes decades of failed paint, hidden body filler, and creeping rust scale.
-
Cut Out and Weld Fresh Metal: Never rivet patch panels or slather thick body filler over active rust. Cut out damaged sheet metal completely and butt-weld fresh steel panels in place.
-
Block-Sand High-Build Primer: Apply epoxy primer over bare metal to seal it, followed by high-build polyester primer. Hand-block the panels using progressively finer sand paper (from 180-grit up to 600-grit) using guide coats to reveal microscopic high and low spots.
-
Spray in a Controlled Environment: Professional auto painting requires a pressurized, downdraft spray booth to keep dust particles out of wet paint. Applying two to three coats of base color followed by three generous coats of high-solids clear coat creates the depth needed for color sanding and mirror-finish buffing.
Install Flush Structural Safety Glass and Weatherstripping Seals
After the clear coat has cured and been polished to perfection, you must seal the cabin against wind and water. Old, dry-rotted rubber window channels leak, allowing rainwater to seep into fresh carpets and jumpstart floorboard rust.
Installing fresh glass requires delicacy:
-
Replace Pitted Front Glass: Never reinstall a pitted, wiper-scratched front glass onto a newly restored vehicle. Installing a brand-new windshield dramatically improves night driving visibility and structural rigidity.
-
Prep the Pinchweld Area: Clean paint overspray from the window frames, apply specialized metal primer, and lay a continuous bead of high-tack automotive urethane sealant.
-
Fit New Weatherstripping: Replace all door seals, window felts, and trunk gaskets with soft, fresh reproduction rubber. Treat seals with silicone grease during assembly to keep them pliable and quiet.
Phase 5: On-Site Diagnostics and Preservation Protocols

The final assembly phase is often where builders experience the highest anxiety. Firing up a freshly built machine, sorting out minor initial bugs, and securing long-term storage are the final hurdles between a project car and a road-tested dream machine.
Utilize Rapid On-Site Support for Initial Startups
The initial startup of a freshly restored vehicle is critical. Camshafts need proper break-in procedures, cooling systems must be bled of air pockets, and fuel, oil, or transmission fluid leaks must be caught within seconds to prevent catastrophic component failure.
When sorting out first-start gremlins on complex builds, bringing technical support directly to your workshop is a game-changer. Calling in a skilled mobile diesel mechanic or specialized diagnostic technician to assist with initial tuning, ECU mapping, or high-pressure fuel priming saves you the headache and risk of flatbedding a non-running project car across town. Having an experienced set of eyes on-site during initial heat cycles helps identify loose fittings, electrical grounds, or sensor errors before they cause damage.
Establish Long-Term Environmental Preservation for Completed Builds
After spending hundreds of hours and thousands of dollars restoring your vehicle, protecting your finished masterpiece from environmental degradation is paramount. Standard outdoor driveways or uninsulated garages expose fresh metal, leather, and paint to humidity spikes, UV rays, and freezing temperatures.
To preserve your restored vehicle for decades:
-
Control Humidity Levels: Store the vehicle in a facility that maintains relative humidity between 40% and 50%. High humidity causes flash rust on bare metal suspension parts, while extremely dry air cracks vintage leather and wood dashboards.
-
Prevent Tire Flat-Spotting: Inflate tires to max rated pressure during extended storage, or park the vehicle on contoured tire-saver ramps to prevent flat spots from developing on soft rubber compounds.
-
Invest in Dedicated Indoor Facilities: Storing your completed project in a secure climate controlled vehicle storage facility shields delicate clear coat from paint-fading UV rays, prevents destructive moisture condensation inside engine cylinders, and keeps pests away from interior wiring looms.
Your Milestone Execution Strategy
Restoring a vehicle is one of the most rewarding journeys an automotive enthusiast can undertake. While the scope of a complete build can feel overwhelming at times, success comes down to tackling one system at a time in the correct operational sequence.
Keep your restoration project on track with this proven approach:
-
Focus on the chassis first to ensure your vehicle is straight, safe, and handles predictably.
-
Overhaul the powertrain and exhaust networks before spending a single dollar on cosmetic bodywork or custom paint.
-
Execute body prep meticulously, knowing that patience during sanding dictates the quality of your final shine.
-
Partner with reliable local specialists for heavy machining, alignment, custom glass work, and diagnostics to bridge any gaps in your DIY toolkit.
By planning carefully around these critical milestones, you can transform your project car vision into a thrilling reality—creating a road-ready machine you will be proud to drive and show for years to come.